
Hi Guys,
This is a New Installation of Kali Linux 2016.2, after a long post, of Kali Linux 1.0.3. The procedure of installation is same. I want to show you a new look and feel of Kali Linux Interface. Please go through step-by-step procedure of the screenshots provided for Kali Linux Installation.
Prerequisite:
---------------
1. kali-linux-2016.2-i386.iso (can be downloaded from https://www.kali.org/downloads/)
2. virtual machine that supports kali linux 2.2016 (I am using VMware-workstation-full-12.1.1-3770994)
3. Windows 7 or higher (I am using Windows 10 Pro)
Installation of Kali Linux 2016.2 (Step by Step):
----------------------------------------------------------
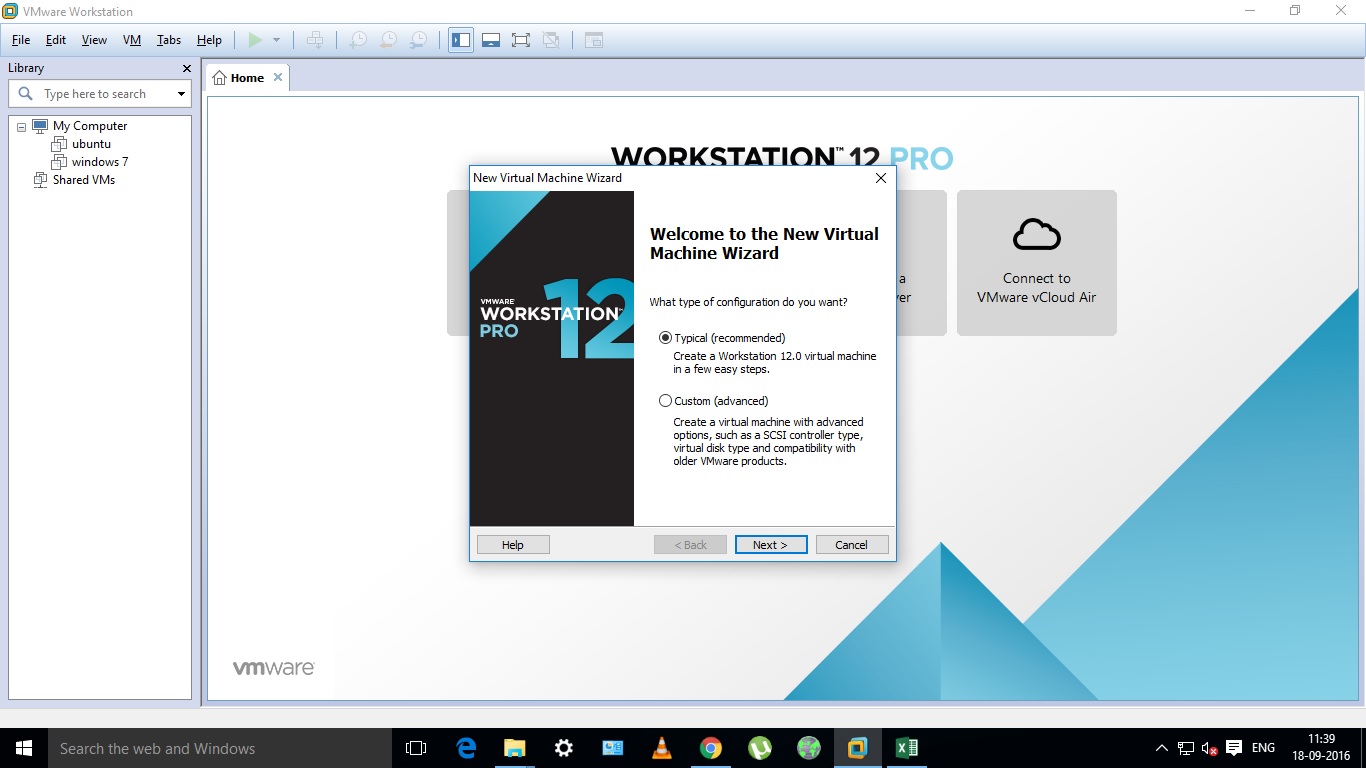
1. Open VMWare and select "Create a New Virtual Machine"

2. Select the option "Typical"), as recommended by VMWare and then click on "Next".

3. If you have Kali Linux DVD, then select "Installer Disc" or if Kali Linux ISO is stored in hard drive then select "Installer disc image file (iso).

4. Please select Guest Operating System as "Linux". The 2nd section, at the bottom, please select Debian 8.x as Version for 32-bit iso or select Debian 8.x 64-bit for 64-bit iso file, and then click on Next.

5. By default virtual machine name is "Debian". You can change it to "kali linux" and please select the location where you want to install Kali Linux.

6. Kali Linux 2016.2 needs 20 GB (recommended space) but you can increase its size limit, if your HDD partition have enough space.

7. The next pop-up window will show virtual machine settings.

8. You can customize virtual machine setting or if the configuring setting is fine then Power ON virtual machine.

9. The next screen shows GUI. Please select Graphical Install option. It will boot up to configure GUI. Below are the screenshots where you can select language, location, region and keyboard type. Once everything is fine, virtual machine will detect the CD/DVD or mount ISO file. Finally it will load its components, detect and configure network (if network hardware is found on the system).


10. If network hardware is detected properly on your system, then please type host-name, domain (optional) and password for your account. Once verified, it will detect assigned virtual disk.


11. The next window will show partition table. Please select Guided- use entire disk.

12. Select the partition disk where you can create partition.

13. In the next window, please select "All files in one partition" (recommended for new users) and then click on Finish partition and write changes to disk. Alternatively, you can customize your partition, where you have to create "/", "/home", "swap", "var", "temp".


14. Once partition is configured properly. Please select "Yes" to make changes on the disk. The next screen will show you the installation of Kali Linux 2016.2.


15. Once installation is complete, it will ask you to install updates from the network mirror. I skipped this option, as my internet is slow and so I select No and clicked on Continue. You can proceed if you have a high speed internet.

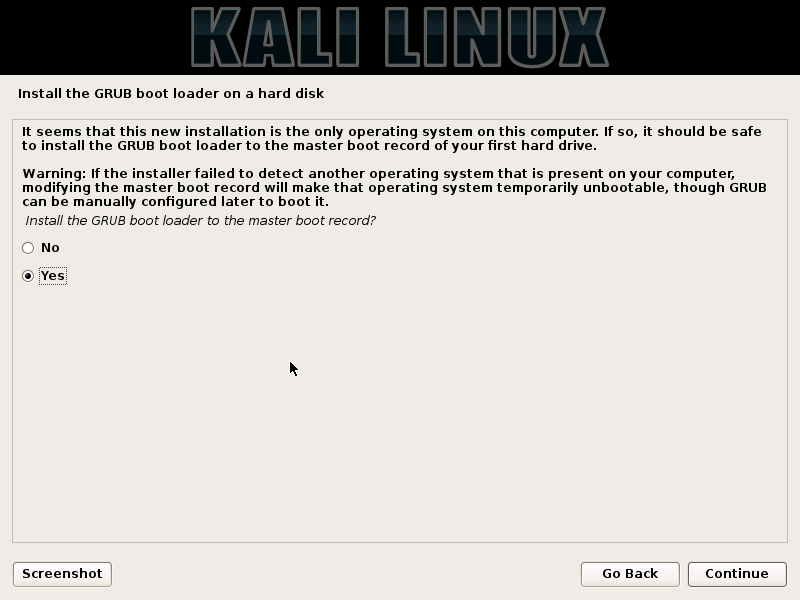
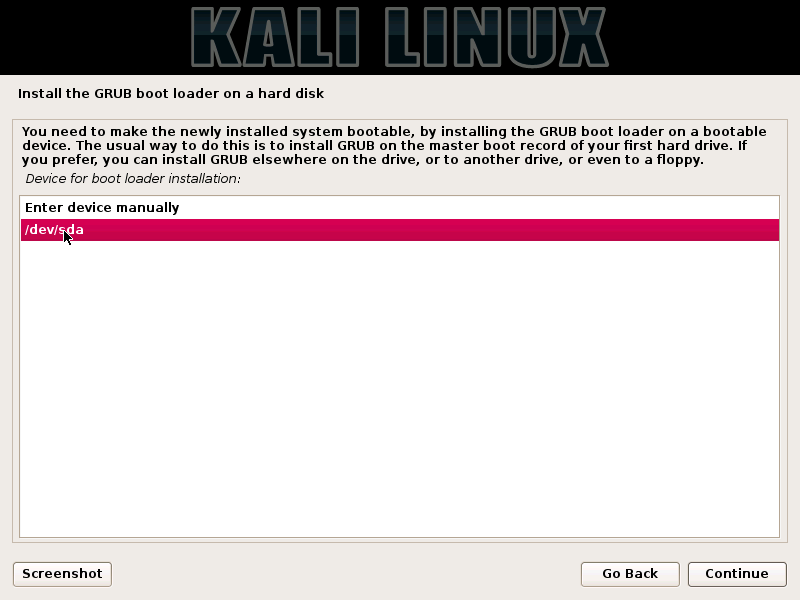
16. The next window will check and install Grub Boot Loader on your virtual hard drive. It will ask you if it can install on Master Boot Record. If you have multiple virtual OS install on VMWare then you can select as Yes and proceed. You can select the default boot path or can manually enter boot path for Grub installation.


17. Once Grub is installed on the selected location, Kali Linux comes to an end to finish its installation.

18. Once Kali Linux installation is complete, it will ask you boot to the new system. Please remove installation media and system is going to boot to a new system.


19. Kali Linux Grub Loader interface of a new system.

20. Please enter username and password of the new system installed.

21. A new look n feel interface of Kali Linux 2016.2.

22. To install VMWare Tools, please goto VM on VMWare menu and then select Install VMWare Tools. Once shows VMWare Tools CD/ DVD on Kali Linux desktop, please go through the installation process in virtual CD/ DVD.

This is a New Installation of Kali Linux 2016.2, after a long post, of Kali Linux 1.0.3. The procedure of installation is same. I want to show you a new look and feel of Kali Linux Interface. Please go through step-by-step procedure of the screenshots provided for Kali Linux Installation.
Prerequisite:
---------------
1. kali-linux-2016.2-i386.iso (can be downloaded from https://www.kali.org/downloads/)
2. virtual machine that supports kali linux 2.2016 (I am using VMware-workstation-full-12.1.1-3770994)
3. Windows 7 or higher (I am using Windows 10 Pro)
Installation of Kali Linux 2016.2 (Step by Step):
----------------------------------------------------------
1. Open VMWare and select "Create a New Virtual Machine"

2. Select the option "Typical"), as recommended by VMWare and then click on "Next".
3. If you have Kali Linux DVD, then select "Installer Disc" or if Kali Linux ISO is stored in hard drive then select "Installer disc image file (iso).

4. Please select Guest Operating System as "Linux". The 2nd section, at the bottom, please select Debian 8.x as Version for 32-bit iso or select Debian 8.x 64-bit for 64-bit iso file, and then click on Next.

5. By default virtual machine name is "Debian". You can change it to "kali linux" and please select the location where you want to install Kali Linux.

6. Kali Linux 2016.2 needs 20 GB (recommended space) but you can increase its size limit, if your HDD partition have enough space.

7. The next pop-up window will show virtual machine settings.

8. You can customize virtual machine setting or if the configuring setting is fine then Power ON virtual machine.

9. The next screen shows GUI. Please select Graphical Install option. It will boot up to configure GUI. Below are the screenshots where you can select language, location, region and keyboard type. Once everything is fine, virtual machine will detect the CD/DVD or mount ISO file. Finally it will load its components, detect and configure network (if network hardware is found on the system).


10. If network hardware is detected properly on your system, then please type host-name, domain (optional) and password for your account. Once verified, it will detect assigned virtual disk.


11. The next window will show partition table. Please select Guided- use entire disk.

12. Select the partition disk where you can create partition.

13. In the next window, please select "All files in one partition" (recommended for new users) and then click on Finish partition and write changes to disk. Alternatively, you can customize your partition, where you have to create "/", "/home", "swap", "var", "temp".


14. Once partition is configured properly. Please select "Yes" to make changes on the disk. The next screen will show you the installation of Kali Linux 2016.2.


15. Once installation is complete, it will ask you to install updates from the network mirror. I skipped this option, as my internet is slow and so I select No and clicked on Continue. You can proceed if you have a high speed internet.

16. The next window will check and install Grub Boot Loader on your virtual hard drive. It will ask you if it can install on Master Boot Record. If you have multiple virtual OS install on VMWare then you can select as Yes and proceed. You can select the default boot path or can manually enter boot path for Grub installation.


17. Once Grub is installed on the selected location, Kali Linux comes to an end to finish its installation.

18. Once Kali Linux installation is complete, it will ask you boot to the new system. Please remove installation media and system is going to boot to a new system.


19. Kali Linux Grub Loader interface of a new system.

20. Please enter username and password of the new system installed.

21. A new look n feel interface of Kali Linux 2016.2.

22. To install VMWare Tools, please goto VM on VMWare menu and then select Install VMWare Tools. Once shows VMWare Tools CD/ DVD on Kali Linux desktop, please go through the installation process in virtual CD/ DVD.

THANKS