Sunday 22 December 2013

PwnSTAR for Kali Linux

PwnSTAR (Pwn SofT Ap scRipt) is a bash script to launch a Fake AP, configurable with a wide variety of wireless attack options now runs on Kali Linux. Here are the features of PwnSTAR.

  • takes care of configuration of interfaces, macspoofing, airbase-ng and isc-dhcp-server
  • steals WPA handshakes
  • phishes email credentials
  • serves webpages: supplied (eg hotspot, below) or provide your own
  • sniffing with ferret and sslstrip
  • adds a captive portal to the frontend of the fake AP
  • assorted exploits
  • de-auth with MDK3, aireplay-ng or airdrop-ng

Please click on PwnSTAR for Kali Linux.

Build your own live distros

Linux Live Kit is a set of shell script that allows you to create your own distros from an installed distros.

802.11 Recommended Wireless Cards

2.4GHz

Rokland N3
Ralink RT3070
700 mW
Detachable antenna (RP-SMA)
IEEE 802.11b/g/n
150Mbps
WEP, WPA/WPA2, WPS
USB 2.0

Alfa AWUS036NHA
Realtek AR9002U
~800 mW (29dBm)
Detachable antenna (RP-SMA)
IEEE 802.11b/g/n
150Mbps
WEP, WPA/WPA2, WPS
USB 2.0

TP-Link WN722N
Atheros AR9002U
500 mW ?
Detachable antenna (RP-SMA)
IEEE 802.11b/g/n
150Mbps
WEP, WPA/WPA2, WPS
USB 2.0


5GHz (& 2.4GHz)
Rosewill RNX-N600UBE
Ralink RT3572
100 mW ?
Detachable antenna (SMA)
IEEE 802.11a/b/g/n
300Mbps
WEP, WPA/WPA2, WPS
USB 2.0


Other useful links
http://www.aircrack-ng.org/doku.php?id=install_drivers&DokuWiki=da99a9c68c695169b88b295a9a3a3806
http://aircrack-ng.blogspot.co.uk/2012/01/best-card-or-best-laptopnetbook-for.html

A General Suggestion

While working with Kali Linux, if you find Kali Linux freezes occasionally, then follow few steps.

STEP 1: Check if other OS, if installed, is working properly.
STEP 2: If  YES, then check STEP 3 and if NO then check STEP 4
STEP 3: It could be an issue with Kali Linux. Perform below steps to resolve the issue.
STEP 4: 
  • check HDD if found any bad sectors
  • check RAM "clean if needed"
  • check if any usb drive is attached
  • check power supply and static problems around or in the pc/laptop

Thursday 7 November 2013

Installing VirtualBox in Kali Linux

Here are the steps involved to install VirtualBox in Kali Linux.
  • Goto this link https://www.virtualbox.org/wiki/Linux_Downloads and select Debian version, either i386 or AMD64(depending upon the platform of your computer have). My system support i386. Select the location to download the file. I chose Debian 7.0 ("Wheezy") and the version of virtualbox is 4.3.2.
  • Once the file is downloaded, open root terminal window and goto the downloaded directory. My default directory is /root/downloads.
  • Now run, dpkg -i virtualbox-x.x.x.x~Debian~wheezy_i386.deb (where x is replaced by version of virtual box)
eg.: root@kali:~Downloads# dpkg -i virtualbox-4.3_4.3.2-90405~Debian~wheezy_i386.deb

Once we run this command, it de-compress the .deb package, start setting virtualbox environment and checks if any recent update is available.


Once setup is installed sucessfully, you can goto Applications to check if VirtualBox in listed there or not. Applications--> Systam Tools--> Oracle VM VirtualBox. Click on it to start VirtualBox.


Sunday 6 October 2013

Wired Network “unmanaged” in Network Manager

Issue:

  • WLAN works fine with NetworkManager
  • Wired Device (ethX) is marked as “unmanaged” and doesn’t work even if it gets DHCP-lease/IP-address
  • /etc/network/interfaces looks correct

Solution:

  • Open root terminal and type
      leafpad /etc/NetworkManager/NetworkManager.conf and then edit
          ...
          [ifupdown]
          managed=true
          ...
  • Save the file. Inorder, to make the changes to come to an effect, type
      /etc/init.d/network-manager force-reload

Tuesday 10 September 2013

Kali Linux 1.0.5 released

Offensive Security, the developer behind the Backtrack and Kali Linux operating systems, has announced a few days ago that a new maintenance release of the Kali Linux distribution for forensic and penetration testing tasks is available for download. Here is the link for download.

Wednesday 4 September 2013

Install Kali Linux on Android Phone or Tablet

You can now install Kali Linux on any Android Phone or Tablet. Pre-requisite to install Kali Linux is here below.

  • OS version: Android 2.0
  • Memory: 5 GB free
  • Fast wireless connection
  • Patience to wait for distribution and boot from the network
Please click here to follow the steps. Thanks.


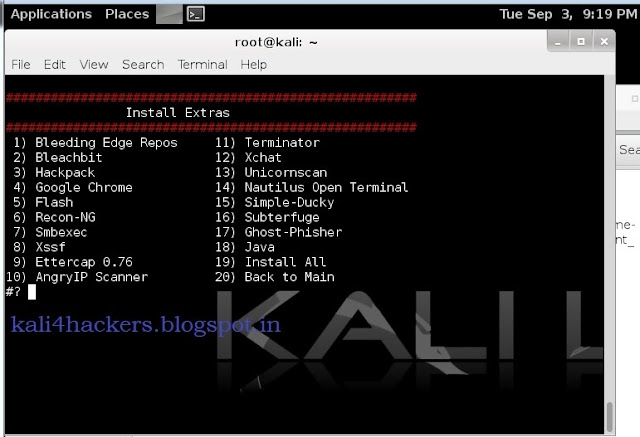
LazyKali script for Kali Linux

LazyKali is an awesome script written in bash shell. It can automate the whole update and install new tools in your hack repository. As the name suggests, you can get all the updates on Kali Linux and your repositories in one place by running this script. Please read the description of the project here to know what tools are there that are going to be added when you run the script. Download lazykali.sh.

* Warning: Disable firewall or Internet Security application if your Kali Linux is installed in a virtual machine.

To install the script on Kali Linux, run 
  • rootkali:~#./lazykali.sh on root terminal window. (If you get a message Permission Denied, then first type rootkali:~#chmod +x lazykali.sh and then rootkali:~#./lazykali.sh).
  • if the script is not installed it may prompt you to install. Type Y to install the script.

  • Once the script is installed, it will check the version. If the version is old, allow it to update by typing Y.

  • Once execute, you will get a command line interface. Check the below screenshot of the tool.

  • If Kali Linux is not updated, then type 1 to update Kali Linux. Once it is updated, type 6 to check available tools that LazyKali offers you.


  • Type 3 to install Hackpack. It will prompt you to install Hackpack. Type Y to install Hackpack.

  • Now click on Applications on the top left corner of Kali Desktop and you will find Hackpack tab.

The advantage of LaziKali is that you can modified the code and add some extra tools to this script to save time and effort. Please find the source code: https://code.google.com/p/lazykali/source/browse/lazykali.sh


Tuesday 20 August 2013

How to reset root password

1. Boot the machine and wait until GRUB Boot Loader comes up. Select recovery mode and then press e to edit.

2. Change the permission mode from ro to rw and modify boot loader file in init=/bin/bash and then F10 make the changes and reboot the system.

3. Once the system reboot, shell prompts you for the password to manage the system. Type passwd root and then type the desired password of your choice. Confirm the password and then hit enter. If new password and retype new password matches correctly, then you will get the message password updated successfully. Type shutdown -h now to press power button to shutdown the system and then boot the system again.

4. Type root and the new password. If you type the new password correctly, then you will desktop screen of Kali Linux.

Wednesday 14 August 2013

Project Artillery


Project Artillery is an advanced active response tool for detecting attackers before they have the chance to hit the rest of your network. Project Artillery is an open-source Python-driven tool written purely in native Python. The purpose of Artillery is to provide a combination of a honeypot, file-system monitoring, system hardening, real-time threat intelligence feeds, and overall health of a server to create a comprehensive way to secure a system. Project Artillery was written to be an addition to security on a server and make it very difficult for attackers to penetrate a system. The concept is simple. Project Artillery will monitor the filesystem looking for any type of change, if one is detected, an email is sent to the server owner. If SSH brute force attacks are detected, notifications will be sent to the server owner, as well as ban the offending IP address.

Project Artillery has a built in threat intelligence feed that automatically blocks attackers known from other sensors deployed around the globe. The “Artillery Threat Intelligence Feed” (ATIF) is a number of TrustedSec owned servers strategically deployed around the globe and feeding real-time intelligence back to your Artillery installations. This allows you to be on a defensive ground for already known attackers prior to them ever hitting you. When Artillery is deployed, it contacts TrustedSec’s central intelligence feed to pull multiple Artillery sensors located around the globe into a realtime alerting system of attacker IP addresses. The Artillery systems you install will continuously pull the feeds in realtime and have coverage from attacker addresses prior to them hitting you.

One of the most effective features is the honeypot aspects of Artillery. Artillery will open a series of pre-defined ports that are commonly attacked. For example 135/445 (RPC/SMB), 1433 (MSSQL), 5900 (VNC), and many others. If an attacker attempts to port scan or connect to these ports, a random sequence of random data is sent back to the attacker to look as a strange protocol then bans the offending attacker. Using this method on the Internet yielded over 973 blocked offenders within leveraging it in a weeks timeframe

To download Project Artillery, you must utilize github and issue the following command:

Sunday 28 July 2013

Kali Linux 1.0.4 Released

Since the initial release of Kali have seen a large number of changes, upgrades and improvements in the distribution, all of which are included in version 1.0.4.

Kali Linux is an open source project developed by the Offensive Security, a successor to BackTrack Linux. This Kali Linux Update release with more new addition tool.

In addition to the new tools added to the distribution, version 1.04 of Kali Linux also contains many upgraded packages. Some of the more notable updates are:
As usual, you do not need to re-download Kali Linux 1.0.4 if you already have it installed. A regular “apt-get update && apt-get dist-upgrade” will do the job of getting you to the latest and greatest!
For more info on Kali Linux visit Official blog by Click Here or Download ISO Image from Download page.

Saturday 20 July 2013

Some of the best sites to crack MD5 Hashed

About MD5: MD5 is an algorithm created in 1991 by Professor Ronald Rivest that is used to create digital signatures. It is intended for use with 32 bit machines and is safer than the MD4 algorithm, which has been broken. MD5 is a one-way hash function, meaning that it takes a message and converts it into a fixed string of digits, also called a message digest.
When using a one-way hash function, one can compare a calculated message digest against the message digest that is decrypted with a public key to verify that the message hasn't been tampered with. This comparison is called a "hashcheck."

Here is a list of websites that can crack MD5 Hashes.....

www.tmto.org (recommended)
md5.noisette.ch
md5decryption.com
www.c0llision.net
www.netmd5crack.com
www.md5decrypter.com
md5hashcracker.appspot.com
www.hashhack.com
isc.sans.edu
www.md5crack.com
passcracking.com
authsecu.com
md5.rednoize.com
md5.web-max.ca
www.cmd5.com
md5.thekaine.de
www.shell-storm.org
www.md5this.com
www.hashchecker.com
hashcrack.com
md5pass.com
md5pass.info
cmd5.org

Wednesday 10 July 2013

How to reset Windows password with Kali Linux

Download Kali Linux and burn the ISO to a CD/DVD. Boot Windows machine with the LiveCD. On the boot menu of Kali Linux, select Live (forensic mode). Kali Linux initialize and when it loads, it will open a terminal window and navigate to the Windows password database file. Almost all versions of windows password is saved in SAM file. This file is usually located under /Windows/System32/config. On your system it may look something like this: /media/hda1/Windows/System32/config. Below is the screenshot.
The SAM database is usually in the /media/name_of_hard_drive/Windows/System32/config

The screen shot below lists the SAM database file on my hard drive. The screen shot below lists the SAM database file on my hard drive.

Type command chntpw -l SAM and it will list out all the usernames that are contained on the Windows system.
The command gives us a list of usernames on the system. When we have the username we want to modify and we simply run the command chntpw -u “username” SAM

In the example below we typed: chntpw -u “Administrator” SAM and we get the following menu:

We now have the option of clearing the password, changing the password, or promoting the user to administrator. Changing the password does not always work on Windows 7 systems, so it is recommended to clear the password. Therefore you will be able to log in with a blank password. You can also promote the user to a local administrator as well.


Monday 8 July 2013

Access Kali Linux through Remote System

There are several open source and enterprise software program through which we can access remote system. These software becomes a necessity when you setup a remote server and do not allow direct access to the server, as because of some security measures. PuTTy is one of the major terminal emulator through which we can access a remote server. PuTTy is a free and open-source terminal emulator, serial console and network file transfer application. It supports several network protocols, including SCP, SSH, Telnet and rlogin. Here, I am going to show you how to access Kali Linux through PuTTy. My base computer is running Windows 7 and Kali Linux is installed in a VMWare Player. So we can assume that Kali Linux is installed in a remote machine, as Windows 7 and of Kali Linux is on different network now.
Before we access Kali Linux through remote system, we need to make sure that ssh service is already running in Kali Linux.
To check the status of ssh service. Open root terminal and type service --status-all


In case it shows [-], then it means ssh service is not running and you have to enable ssh service first. To do this type apt-get install openssh-server from terminal window. Once, it shows [+] sign it means service is enable. Now, we type service ssh start to run ssh service.

Once we are sure that ssh service is running in remote Kali Linux, we have to perform one more step. Run ssh-keygen -t rsa to setup rsa key for ssh authentication and enter filename and passphrase to save the key. Once this is done we are good to go.

Now open PuTTy application and type the ip address of Kali Linux (if you are not sure then type ifconfig command on Kali Linux root terminal window). Let the port no. be default, select ssh and click on open. If everything is fine then it will ask you to enter login name and password. Once you enter the correct login and password, you will get privilege to access Kali Linux from console mode.

Thursday 4 July 2013

Kali Linux review and a brief history of the BackTrack

Looks like Kali Linux is a great success. Kali Linux is the successor to BackTrack, the much loved Linux Penetration Distro/ Operating System that is aimed at penetration testers and security professionals. Before we dive into our brief review – we thought it would be cool to give a brief history of how Kali Linux came to be.
What is the history of Kali Linux and BackTrack?
We are all very familiar with Backtrack, which has been around for the last seven years – created and managed by Offensive Security, but what is the history of this famous Linux penetration testing distribution?
Much like we trace our ancestors back to Africa, so we trace Kali Linux back to Knoppix! Knoppix was one of the first ever bootable Live Linux Distro’s. Still in existence, Knoppix is a classic distro with a loyal community. Over time the Knoppix project was forked into WHoppix (yes the WH are meant to be capitalized) that was then re-forked into WHAX. WHAX was then re-branded and streamlined into the BackTrack that we all used. There is a common thread throughout these distros, (Knoppix, which became WHoppix, and then WHAX and finally into BackTrack); that is that the lineage focused on intrusion detection and digital forensics. BackTrack expanded the scope and allowed for many more tools to be incorporated into the distro. In any event, BackTrack had a long reign of almost seven years as the pentesters and hackers distro of choice. However, as of March 2013 the venerated distro was decommissioned and replaced by Kali Linux. Phew. Long story – but the bottom line is that Kali Linux is the result of a rich and colorful history.
So why bother changing the name?
Kali Linux is so different that the fine folks over at Offensive Security thought that to solve the ‘inherent problems’ of BackTrack the authors needed a complete re-write. The main issue with BackTrack v1-v5 was that it was a headache for dependencies. Here was the problem: too many pentesting tools embedded within BackTrack all struggled to co-exist within the dependencies. Many pentesting and security tools where not regularly updated by their creators so the result was that trying to update the entire OS often caused conflicts and tools would simply stop working, crash or even cause other tools to crash. A good example of this is Ettercap which was not updated for a long time.
The solution was to rebuild the distro bottom-up by making Kali Debian based. Before with BackTrack there was a /pentest/ folder, whereas now it is all updated and managed by Debian packages.
Kali Linux has 300 tools which automatically work within the Kali ecosphere. Kali also has been created with the clean “File system Hierarchy Standard” and offers vast plug and play wireless support, with the only exception appearing to be broadcom.
ARM Support
Another interesting feature about Kali Linux is that it supports ARM architecture meaning that you can use the distro on Raspberry Pi’s and Chromebooks etc. Incidentally, you can also create your own .iso file with Kali through the Debian lifebuild feature.
In summary
Kali is a well thought out penetration testing distribution which had to address its’ previous problems with regards to updates. The distro has two modes: forensics and default, all of which run best (in our opinion) in gnome. All the usual pentesting tools work with the distro with ease and the file hierarchy is the same as previous BackTrack versions – so you won’t have a problem using this distro if you are previous BackTracker. Offensive Security still insist that you run the OS as root so this probably won’t be your day to day distroFor pentesting Kali Linux is clearly an awesome OS with the world’s best pentesting suite of tools that can all be preconfigured. Couple that with the very large and loyal community, bug tracking service and attention to detail and yes, it is a solid pentesting Linux distribution.

Friday 28 June 2013

Some basic commands for Kali Linux

File Operations
pwd                        Print Name Of Current/Working Directory
cd                         Changing The Working Directory
cp                         Copy Files Or Directory
rm                         Remove Files And Directory
ls                         List Of Directory Contents
mkdir                      Make Directory
cat                        Concatenate Files And Print On Standard Output
mv                         Move Files
chmod                      Change Files Permissions

Know Your System                                                 
uname                      Print System Information
who                        Show Who Is Logged On
cal                        Displays Calculator
date                       Print System Date And Time
df                         Report File System Disk Space Usage
du                         Estimate File Space Usage
ps                         Displays Information Of Current Active Processes
kill                       Allows To Kills Process
clear                      Clear The Terminal Screen
cat /proc/cpuinfo          Cpuinfo Display CPU Information
cat /proc/meminfo          Display Memory Information

Compression
tar                        Store and Extract Files From An Archive File
gzip                       Compress Or Decompress Named Files

Network
ifconfig                   To Config Network Interface
ping                       Check Other System are reachable from The Host System
wget                       Download Files From Network
ssh                        Remote Login Program
ftp                        Download/Upload Files From/To Remote System
last                       Displays List Of Last Logged In User
telnet                     Used To Communicate With Another Host Using THe Telnet Protocol

Searching Files
grep                       Search Files(s) For Specific Text
find                       Search For Files In A Directory Hierarchy
locate                     Find Files By Name

TOR for Kali Linux

Tor (used to stand for "The Onion Router", but it's no longer considered an abbreviation, so it's just "Tor"), is an anonymity network, used to surf the web (and more) anonymously. Basically, anyone running the Tor software on their computer runs a proxy, and traffic gets passed (encrypted) from one person running Tor to another person running Tor, multiple times through many users, until it get's to the page that you requested. Hence the term "Onion" used to describe it, since it works in "layers". Each person running Tor on their computer is called a "Node".

To the page (and anyone logging requests to that page, such as the website owner for example) they can only see the IP address of the last Node (called the "end node"). Any communication along the way, between you, when you request the website page, and the final destination, is encrypted, and cannot be analyzed. However, the last Node in the chain can log and view traffic through it, if the person running it is unscrupulous, so for that reason it can't be said that Tor is 100% anonymous.


TOR Auto-install Shellscript

#!/bin/sh
echo "deb http://deb.torproject.org/torproject.org wheezy main" >> /etc/apt/sources.list
clear scr
echo "[*] Installing the keys...."
gpg --keyserver keys.gnupg.net --recv 886DDD89
gpg --export A3C4F0F979CAA22CDBA8F512EE8CBC9E886DDD89 | sudo apt-key add -
echo "Ready!!"
clear scr
echo "[*] Updating Repositories...."
apt-get update
clear scr
echo "[*] Installing TOR"
apt-get install deb.torproject.org-keyring
apt-get install tor
echo "Ready!!"
echo "[*] Installing Vidalia"
apt-get install vidalia
echo "Ready!!"
echo "[*] Installing iceweasel-torbutton"
apt-get install iceweasel-torbutton
echo "Ready!!"
clear scr
echo "[*] Installing Privoxy"
apt-get install privoxy
echo "[*] Configuring privoxy"
echo "forward-socks5 / 127.0.0.1:9050 ." >> /etc/privoxy/config
echo "Ready!!"
service tor restart
service privoxy restart
echo "Tor has been installed successfully."


Save this script to a file like torinstall.sh and chmod +x it.
#chmod +x torinstall.sh
#./torinstall.sh

Tuesday 25 June 2013

Thursday 20 June 2013

Kali Cleaner: A small cleaner for Kali Linux

What it does?
It cleans apt cache.
Remove old config files.
Remove old kernels.
Empty every trashes.

What you can do is to save the script on your Desktop. Make it executable and clean kali linux.

Ex: root@kali:~/Desktop# ./kali_cleaner.sh

Download:
https://github.com/MasterButcher/kali-cleaner

or you can use command in terminal:
git clone https://github.com/MasterButcher/kali-cleaner.git

Tuesday 18 June 2013

Kali Linux: A complete InfoSec Distro

BackTrack has always been a popular choice when it comes to security and penetration testing. This open source distro has gained a lot of popularity and was rolled till version 5 with frequent changes to the variants. This project from Offensive Security has been moved from Ubuntu to Debian and the operating system is now renamed as Kali Linux. If you have installed a fresh copy of Kali Linux, then you might have noticed some awesome security and penetration tools under Kali Linux drop down menu list. These tools are powerful and yet efficient to use.
If you go through the menu list of security tools, you might have noticed that few like Wireless Attacks, Forensics and Reverse Engineering is added, which is quite impressive. One more section has been added in the list, ie Hardware Hacking. One more thing that you would be happy to see is Arduino kit on the list. Arduino is a single-board microcontroller designed to make the process of using electronics in multi-disciplinary projects more accessible. The hardware consists of a simple open source hardware board designed around an 8-bit Atmel AVR microcontroller, though a new model has been designed around a 32-bit Atmel ARM. The software consists of a standard programming language compiler and a boot loader that executes on the microcontroller. The Forensic tools added were also quite impressive, thus making Kali Linux a complete security distro.
Another good option when it comes for the pen testing point of view was Stress Testing. Rather than checking out for different tools over the internet, tools have been provided for stress testing.
Though InfoSec professionals setup their own machines as per as their requirements. But Kali Linux is a complete InfoSec ased distro that gives you versatile features under one distro. The distro can be downloaded from the official page. ARM option gives power to tablet users this time.

Tuesday 11 June 2013

How to access a drive or a folder in a network through Kali Linux

In this scenario, I have Windows 7 and Kali Linux operating systems. Kali Linux is installed in a virtual server, i.e. vmware player

(A) Now to create a shared drive or folder in Windows 7
  • Click on Start  and then on Computer
  • Select the drive or the folder you want to share. Right click on it, then click on Share with and then on Advanced sharing...
  • Goto Sharing tab and click on Advanced Sharing...

  • Check on Share this folder, then click on Add button to give Share name and Description of the drive or folder and select the number of users that you allow to share the drive or folder. Then click on permissions and add number of users to whom you grant permission to share your drive or folder in a network. Click on OK to all pop windows that has opened so far. This will take affect and you will see shared drive or folder in the network.

(B) Open vmware player and allow Kali Linux to boot.
  • Login with username and password
  • Press Alt. + F2 key to bring run dialog box. 
  • type smb://username/shared, where 'username' is the host name and 'shared' is the drive or folder name that has to accessed (smb is a program of samba distribution that allows to maintain interoperability between linux/unix server and windows client), then click on 'Run'.
  • type 'username' and 'password' of windows 7 user to access the drive or folder (username and password is the account of the user where the drive or folder has been shared) and click on 'Connect'.

This will mount the shared drive or folder and it will appear on the desktop of Kali Linux.

Wednesday 5 June 2013

Debian Sources List Generator

1. goto http://debgen.simplylinux.ch/
2. click on 3rd party repos
3. fill the details as per your requirement and click on send
4. now select sources under Default Debian Packages and if necessary check on yes include, if source packages are required and then click generate sources.list button to generate your links
5. add them to etc/apt/sources.list
6. open root terminal and type apt-get update

Tuesday 4 June 2013

** An Important Suggestion

A suggestion to those who want to experiment or do testing with their OSes. I suggest you not to make your system with dual or triple partition. If you are not sure with partition table or with boot loader, then you may mess up with mapping partition of OSes in boot loader. It's really a tedious job, and if the OS is not mount properly your important data may be lost which you may not able to recover in future. Dual partition makes you no good to your system other than the user interface to access different OSes of your choice. I suggests you to install virtual manager or server, like vmware player, oracle virtualbox, virtual pc in your OS, where you can experiment with different OSes, do testing, unlocking of codes, hacking and lots more than you can expect. Happy Hacking.......

Sunday 2 June 2013

Install Kali Linux ARM on Raspberry Pi

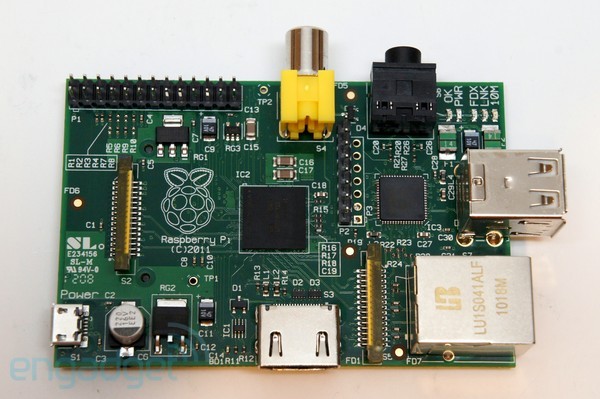
Before we begin, let me give you a brief introduction on Raspberry Pi. Well, a Raspberry Pi is a low budget, small credit-card sized ARM board, that acts as a computer. This board is developed by Raspberry Pi Foundation, UK with the intention of promoting the teaching of basic computer science in schools. The processor at the heart of the Raspberry Pi system is a Broadcom BCM2835 system-on-chip (SoC) multimedia processor. This means that the vast majority of the system’s components, including its central and graphics processing units along with the audio and communications hardware, are built onto that single component hidden beneath the 256 MB memory chip at the centre of the board. It’s not just this SoC design that makes the BCM2835 different to the processor found in your desktop or laptop, however. It also uses a different instruction set architecture (ISA), known as ARM. The ARM-based BCM2835 is the secret of how the Raspberry Pi is able to operate on just the 5V 1A power supply provided by the onboard micro-USB port. It’s also the reason why you won’t find any heat-sinks on the device: the chip’s low power draw directly translates into very little waste heat, even during complicated processing tasks.
Figure(1). Sketch of a Raspberry Pi Board

    Figure(2). Actual view of a Raspberry Pi Board

Figure(3). Raspberry Pi Board in a box

Figure(4). Raspberry Pi Board to work as a computer


Components needed to make Raspberry Pi to a Computer are:

• Raspberry Pi board
• Micro USB lead (for power)
• USB power adapter (also for power)
• HDMI lead: Type A to Type A (to connect to your monitor or TV)
• HDMI display
• SD card: 2 GB to 64 GB (for storage); 8 GB minimum recommended
• SD card reader
• USB keyboard and mouse

Now, let's get started installing Kali Linux for Raspberry Pi.

1. Download Kali Linux for Raspberry Pi image.
2. Use dd utility to image this file to your SD card. Assumed that the storage device is located at /dev/sdb. Please note that this process will wipe out your SD card. If you choose the wrong storage device, you may wipe out your computers hard disk.

root@kali:~ dd if=kali-pi.img of=/dev/sdb bs=512k

This process can take a while depending on your USB storage device speed and image size. Once the dd operation is complete, boot up your Rasberry Pi with the SD card plugged in. You will be able to log in to Kali (root / toor) and startx.

Friday 31 May 2013

** An Important Instruction

As kali linux is new to all of us, being a learner we all come with a new issue and try to resolve it as quickly as possible. While installing software, most of us don't know the dependency packages that are installed or removed from the system. A great feature that kali linux provide is that when we run apt command, it checks the available package/s in the repository and accordingly asks if to install. Meanwhile, it also checks the un-necessary packages that is not required. Here is a command that removes the un-necessary packages. From the root terminal window, please type apt-get autoremove. When you hit 'return' or 'enter'  key, it checks the packages that is to be removed from the system. Please read those packages carefully, before you make confirmation to remove it from the system.

Wednesday 29 May 2013

Installing Firefox on Kali Linux

Mozilla Firefox is a quite handy browser compared to Iceweasel (default browser in Kali Linux). It has lot of plug-in features that Iceweasel lag. Sometimes, we find it difficulty while navigating through Iceweasel. Hence, I thought of installing Mozilla Firefox. To do this, you have to first un-install Iceweasel from Kali Linux or else it won't allow you to install Mozilla Firefox. Here are the step that I performed.

1. Open root terminal window and type
    apt-get remove iceweasel
it removes iceweasel from the application menu

2. type echo -e "\ndeb http://downloads.sourceforge.net/project/ubuntuzilla/mozilla/apt all main" | tee -a /etc/apt/sources.list > /dev/null
it adds repository for the installation

3. type apt-key adv --recv-keys --keyserver keyserver.ubuntu.com C1289A29
import the required gpg key

4. type apt-get update
update the required package

5. type apt-get install firefox-mozilla-build
install mozilla firefox on your sytem

6. type firefox on terminal window to start working with mozilla firefox


Monday 27 May 2013

How to install qbittorrent in Kali Linux

About qbittorrentqbittorrent is a torrent client, an alternative to utorrent. It's a GUI based cross platform free software based on Qt toolkit.

We know that Kali Linux's base package is constructed in Debian, so we need to add http://http.packages.debian.org to sources.list file. To do this,

1. open any text editor and edit sources.list file, located in /etc/apt directory, with an entry deb http://http.packages.debian.org import deb packages.


2. type apt-get install qbittorrent on the root terminal window and press enter

3. Once qbittorrent is installed, type qbittorrent on the root terminal window and press enter

and, you are set to go.

BackTrack vs. Kali Linux

As we know Kali Linux is the successor of BackTrack 5, so there are much similarities to BackTrack in many ways, but it lays a new foundation and makes substantial improvements that will allow it to be even more useful to penetration testers in the coming years.

BackTrack

Many security practitioners have been using BackTrack to perform their security assessments. BackTrack is an open-source Linux-based penetration testing toolset. BackTrack made performing a security assessment easier because all of the common tools that you needed were all packaged into one nice distribution and ready to go at a moment's notice. BackTrack contains so many security tools that it is too difficult to list them all. If you want to see a complete list of all the tools just run "dpkg --list". BackTrack made it easy to create a new VM from the downloaded ISO, perform the assessment, then either archive that VM for future reference or delete it when done to remove the evidence. The latest version of BackTrack is version 5 release 3 and it came out on August 13, 2012. If you want to explore this version, you can download it from this site. But before, you do, check out Kali Linux first.


Kali Linux

Kali Linux is a new open source distribution that facilitates penetration testing. Whereas BackTrack was built on Ubuntu, Kali Linux is built from scratch and constructed on Debian and is FHS-compliant. Kali Linux also has improved software repositories that are synchronized with the Debian repositories so it makes it easier to keep it updated, apply patches and add new tools. It is also easy to customize your own Kali Linux so that it contains only the packages and features that are required. You can also customize your desktop environment to use Gnome(default), KDE, LXDE, XFCE or whatever you prefer.

The development of Kali Linux was funded by Offensive Security. Offensive Security is a security training and penetration testing consulting firm that has been a creator, supporter and maintainer of BackTrack since the beginning. For years they have offered their popular Penetration Testing with BackTrack (PWB) class, but with the introduction of Kali Linux, that class name will likely change.

To get your hands on the latest Kali Linux distribution, you can download it from: http://www.kali.org/downloads or http://cdimage.kali.org.

Kali Linux offers documentation at http://docs.kali.org, bug reporting at http://bugs.kali.org and a Kali forum site at http://forums.kali.org.

Add Repository in Kali Linux

Kali linux is a debian base linux distribution designed for penetration testing. Here, I will give a tutorial on how to add a repository on Kali Linux 1.0.3 with ease. Repository is a archival software, where software in this archive can be retrieved by the user to use. Please click here to check for the new blog post on repository. 

1. Open root terminal and type this code.
   root@kali:~# leafpad /etc/apt/sources.list

2. Add all repositories, i.e. :

deb http://http.kali.org/ /kali main contrib non-free
deb http://http.kali.org/ /wheezy main contrib non-free
deb http://http.kali.org/kali kali-dev main contrib non-free
deb http://http.kali.org/kali kali-dev main/debian-installer
deb http://http.kali.org/kali kali main contrib non-free
deb http://http.kali.org/kali kali main/debian-installer
deb-src http://http.kali.org/kali kali-dev main contrib non-free
deb-src http://http.kali.org/kali kali main contrib non-free
deb-src http://security.kali.org/kali-security kali/updates main contrib non-free

Save the file and exit.

3. root@kali:~# apt-get update

4. root@kali:~# apt-get upgrade

Saturday 25 May 2013

Armitage in Kali Linux

About Armitage

Armitage is a scriptable red team collaboration tool for Metasploit that visualizes targets, recommends exploits and exposes the advanced post-exploitation features in the framework. Through one Metasploit instance, your team will:
  • Use the same sessions
  • Share hosts, captured data, and downloaded files
  • Communicate through a shared event log
  • Run bots to automate red team tasks
Armitage is open source software developed by Raphael Mudge's company Strategic Cyber LLC. However, Cobalt Strike is the commercially supported big brother of Armitage.

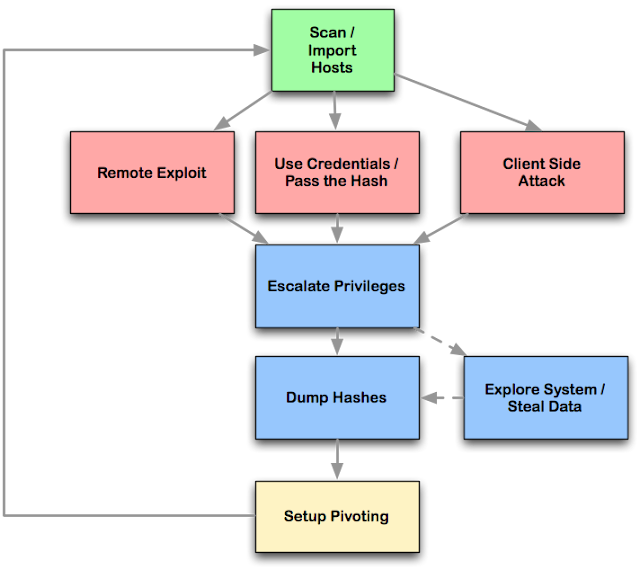
Armitage organizes Metasploit's capabilities around the hacking process. There are features for discovery, access, post-exploitation, and maneuver. This section describes these features at a high-level, the rest of this manual covers these capabilities in detail.
Armitage's dynamic workspaces let you define and switch between target criteria quickly. Use this to segment thousands of hosts into target sets. Armitage also launches scans and imports data from many security scanners. Armitage visualizes your current targets so you'll know the hosts you're working with and where you have sessions.

Armitage recommends exploits and will optionally run active checks to tell you which exploits will work. If these options fail, use the Hail Mary attack to unleash Armitage's smart automatic exploitation against your targets.

Once you're in, Armitage exposes post-exploitation tools built into the Meterpreter agent. With the click of a menu you will escalate your privileges, log keystrokes, dump password hashes, browse the file system, and use command shells.

Armitage makes it trivial to setup and use pivots. You'll use compromised hosts as a hop to attack your target's network from the inside. Armitage uses Metasploit's SOCKS proxy module to let you use external tools through your pivots. These features allow you to maneuver through the network.

The rest of this manual is organized around this process, providing what you need to know in the order you'll need it.

Package dependency before you install Armitage

Armitage exists as a client and a server that allow red team collaboration to happen. The Armitage client package is made available for Windows, MacOS X, and Linux. Armitage does NOT require a local copy of the Metasploit Framework to connect to a team server.

These getting started instructions are written assuming that you would like to connect to a local instance of the Metasploit Framework.


Armitage requires the following:
  • Metasploit Framework and its dependencies.
  • PostgreSQL Database
  • Nmap
  • Oracle's Java 1.7

To quickly install all of the dependencies, you have a few options:
  • Use a Linux distribution for penetration testing such as Kali Linux.
  • These distributions ship with Metasploit and its dependencies installed for you.
  • Use the MSF Installer Script created by DarkOperator (This option will setup an environment that uses Git for updates).
  • Use the official installer provided by Rapid7 (This option will require you to register with Rapid7 to get updates).

Setup Instructions to install Armitage in Kali Linux

  • Open a terminal
  • Initialize the database: service metasploit start
  • Stop the metasploit service: service metasploit stop
  • Extract armitage: tar zxvf armitageDDMMYY.tgz, where DDMMYY is version or date when armitage has launched.

How to Start Armitage

  • Open root terminal
  • type apt-get install armitage
    Before you start Armitage, make sure the postgresql database is running:
    • type service postgresql start
    If you get a missing database.yml error, type:
    • type service metasploit start